
HF PCB Design and Manufacturing Rules

Table of Contents
- Why Simulation and Fabrication Diverge on High Frequency Boards
- Transmission Line Design: Working Within Fabrication Boundaries
- Via Design for HF Signal Transitions: Stubs, Anti-Pads, and Ground Fencing
- Thermal Management Design Constrained by HF Substrate Properties
- Board Edge, Panelization, and Singulation: The RF Impact of Mechanical Design
- RF-Area Solder Mask Strategy: Bare Copper, Selective Mask, or Full Coverage
- How Highleap Supports HF PCB Design-Manufacturing Coordination
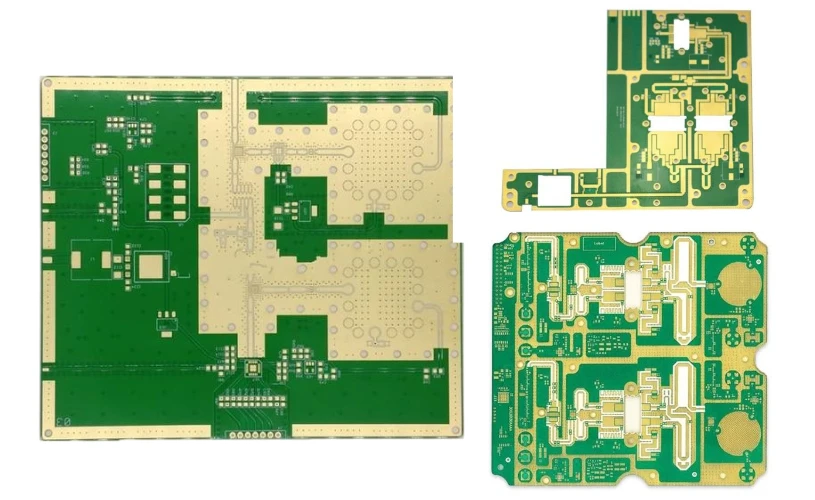
Every discrepancy between your simulation model and the fabricated board has an RF consequence. At 2 GHz, the consequences are usually within noise. At 24 GHz, a 0.02 mm trace width error shifts impedance 2Ω, a standard-roughness copper foil adds 0.3 dB/inch of conductor loss your simulation did not predict, and solder mask accidentally covering a transmission line introduces a dielectric loading effect that shifts your antenna’s resonant frequency. Successful HF PCB design and manufacturing requires the designer to understand what the factory can and cannot control — and to make design decisions that accommodate fabrication realities rather than fighting them. This article maps the specific points where design decisions for high frequency PCBs intersect with manufacturing constraints, providing actionable guidance for RF engineers working toward first-pass success.

1) Why Simulation and Fabrication Diverge on High Frequency Boards
1.1 The Five Sources of Divergence
Every EM simulator assumes ideal geometry unless explicitly configured otherwise. The real board introduces five systematic deviations:
| Divergence Source | Simulation Assumption | Fabrication Reality | Typical Impact at 10 GHz |
|---|---|---|---|
| Trace cross-section | Rectangular | Trapezoidal (etch undercut) | 1–3Ω impedance shift |
| Dielectric constant | Nominal datasheet Dk | Lot-to-lot variation ±0.05 | 1–2Ω impedance shift |
| Copper surface roughness | Smooth conductor | Rz = 1.5–8.0 µm depending on foil type | 0.1–0.5 dB/inch excess conductor loss |
| Dielectric thickness | Nominal core + prepreg thickness | ±0.025 mm variation (resin flow dependent) | 1–2Ω impedance shift |
| Glass weave effect | Homogeneous dielectric | Periodic Dk variation (fiber vs. resin) | ±0.5Ω periodic impedance ripple (woven substrates only) |
These five sources compound. In a worst case, they can shift impedance by 5–8Ω from your simulation target — easily exceeding ±5% tolerance on a 50Ω line. The solution is not tighter fabrication tolerances (which increase cost and reduce yield) but better-calibrated simulation models that incorporate real fabrication data from your manufacturer.
1.2 The Practical Fix: Use Manufacturer Data in Your Simulation
Request from your manufacturer before starting layout:
- Measured Dk from recent production lots on your material (not datasheet typical)
- Etch factor for your copper weight on your material
- Copper foil Rz for the foil type they will use
- Achieved dielectric thickness (measured, not nominal) for your core and prepreg
Input these values into your field solver (Polar SI, Ansys HFSS, Simbeor). The resulting trace width recommendation will produce impedance much closer to target on the first prototype.
2) Transmission Line Design: Working Within Fabrication Boundaries
2.1 Minimum Feature Sizes by Process
| Parameter | Standard Subtractive Etch (1 oz) | Fine-Line Etch (0.5 oz) | Semi-Additive Process (SAP) |
|---|---|---|---|
| Min. trace width | 0.100 mm (4 mil) | 0.075 mm (3 mil) | 0.030 mm (1.2 mil) |
| Min. space | 0.100 mm (4 mil) | 0.075 mm (3 mil) | 0.030 mm (1.2 mil) |
| Trace width tolerance | ±0.020 mm | ±0.015 mm | ±0.008 mm |
| Etch factor (typical) | 2.5–3.5 | 3.0–4.0 | N/A (additive) |
Most HF PCB fabrication uses standard or fine-line subtractive etching. Design your trace widths with sufficient margin above the minimum — a 50Ω microstrip at 0.15 mm width on 1 oz copper is achievable but leaves zero process margin. A design at 0.20 mm width on 0.5 oz copper provides more margin and better etch factor control.
2.2 Differential Pair Design Considerations
Differential pairs are doubly sensitive to etch variation because both trace width and gap spacing change simultaneously. Etch undercut narrows each trace while widening the gap — a compounding effect on differential impedance. For a 100Ω differential pair:
- 0.01 mm etch undercut per side → traces narrow by 0.02 mm total, gap widens by 0.02 mm → differential impedance increases by approximately 3–5Ω
- Design countermeasure: specify the gap slightly narrower than simulation target to compensate for etch widening. Your manufacturer’s etch factor data enables precise pre-compensation.
2.3 Avoiding Glass Weave Dk Variation (Woven Substrates Only)
On substrates with woven glass reinforcement (FR4, Megtron 6, some Isola grades), the Dk varies periodically between glass-rich and resin-rich regions. If a narrow trace aligns with the glass weave pitch, impedance fluctuates along the trace length. Mitigation strategies:
- Rotate the board 5–10° relative to the panel’s glass weave direction (request from manufacturer)
- Use spread-glass prepreg (e.g., Megtron 6 with NE-glass spread treatment) which homogenizes the Dk
- On non-woven substrates (Rogers PTFE, ceramic-filled materials), this effect does not exist — one advantage of choosing Rogers over woven-glass alternatives

3) Via Design for HF Signal Transitions: Stubs, Anti-Pads, and Ground Fencing
3.1 Via Stub Resonance and Back-Drill Requirements
A through-hole via on a multilayer board creates a stub — the unused barrel segment below (or above) the target signal layer. The stub acts as a short-circuited transmission line that resonates at a frequency determined by its length:
- f_resonance ≈ c / (4 × stub_length × √Dk_effective)
- Example: 1.2 mm stub in RO4350B (Dk ≈ 3.5) → resonance at ~33 GHz
If your operating frequency approaches the stub resonance, return loss degrades severely (>10 dB notch). The rule of thumb: if stub length > λ/10 at your operating frequency, back-drilling is recommended.
| Operating Frequency | λ/10 in Dk = 3.5 (mm) | Max. Acceptable Stub Length | Back-Drill Needed on 1.6 mm Board? |
|---|---|---|---|
| 5 GHz | 3.2 | 3.2 mm | No (stub < λ/10) |
| 10 GHz | 1.6 | 1.6 mm | Marginal — depends on via location in stackup |
| 24 GHz | 0.67 | 0.67 mm | Yes — any via with stub > 0.67 mm |
| 77 GHz | 0.21 | 0.21 mm | Yes — even after back-drilling, residual stub (±0.1 mm) must be simulated |
Design implication: account for the manufacturer’s back-drill depth tolerance (typically ±0.1 mm) in your simulation. The residual stub of 0.1–0.15 mm after back-drilling still has RF impact above 40 GHz.
3.2 Anti-Pad Sizing
Anti-pads (clearance holes in reference planes around via pads) affect impedance at the via transition. Larger anti-pads increase the discontinuity capacitance reduction but must not violate drill-to-copper clearance. Design anti-pads based on the manufacturer’s drill registration tolerance (typically ±0.05 mm) plus a minimum clearance margin (0.10 mm), not from generic DFM default values.
3.3 Ground Via Fencing for Mode Suppression
Signal vias in stripline or CPW structures require surrounding ground vias to suppress parallel plate modes. The maximum ground via spacing should not exceed λ/10 at the highest operating frequency. At 28 GHz in Dk = 3.5 material, this means ground via spacing ≤ 0.57 mm. Work with the manufacturer to confirm this spacing is achievable given their drill registration accuracy and minimum via-to-via clearance.

4) Thermal Management Design Constrained by HF Substrate Properties
4.1 Thermal Conductivity of HF Materials
HF substrates have significantly lower thermal conductivity than metals or even ceramic substrates:
- RO4350B: 0.62 W/m·K
- RT/duroid 5880: 0.20 W/m·K
- FR4: 0.30 W/m·K
- Aluminum (for comparison): 205 W/m·K
For high-power RF amplifiers (GaN PAs, GaAs MMICs), the substrate is a thermal bottleneck. Thermal via arrays under the device provide the primary conduction path through the substrate to an internal copper plane or exposed bottom pad.
4.2 Thermal Via Constraints on PTFE
Thermal via design on PTFE substrates is more constrained than on FR4:
- Aspect ratio limit: PTFE via plating is reliable up to approximately 8:1 aspect ratio (depth:diameter) with plasma desmear. A 1.6 mm board requires minimum 0.2 mm via diameter.
- Via-to-via pitch: Thermal via arrays typically use 0.6–1.0 mm pitch. Below 0.5 mm pitch, drill registration error risks via-to-via shorting.
- Filled vs. unfilled: Copper-filled vias provide better thermal performance than plated-through vias but add cost. Confirm with the manufacturer whether copper-filled vias are available on your HF substrate.
4.3 Copper Balancing for Warpage Control
Asymmetric copper distribution causes board warpage during lamination and reflow. HF boards are especially prone to warpage because Rogers and FR4 layers have different CTE values — the board wants to bend differently on each side. Design countermeasures:
- Match copper area on top and bottom layers within 15%
- Add copper thieving (dummy copper fill) on layers with less copper area
- Ensure inner layers are symmetrically constructed (same material and copper weight above and below the center line)
The manufacturer can review your copper balance and recommend specific thieving patterns during DFM review.

5) Board Edge, Panelization, and Singulation: The RF Impact of Mechanical Design
5.1 Trace-to-Edge Clearance on PTFE
PTFE and ceramic-filled substrates are more brittle than FR4. During board singulation (routing or V-scoring), edge chipping propagates further into the board. If an impedance-critical trace runs near the board edge, chipping can damage the trace or alter the dielectric boundary, shifting impedance.
Minimum trace-to-edge clearance recommendations:
- FR4: 0.25 mm (standard)
- RO4350B / RO4003C: 0.50 mm
- RT/duroid 5880 / pure PTFE: 0.75 mm
5.2 V-Score vs. Tab Routing
V-scoring creates a groove along the board boundary that allows snap-separation after assembly. Tab routing uses routed slots with breakaway tabs. For HF boards:
- V-score is suitable when the board edge does not carry RF traces and the substrate is not pure PTFE (V-scoring on PTFE can cause delamination).
- Tab routing is preferred when board edges carry antenna elements or transmission lines, or when the substrate is PTFE-based. Tab location should avoid RF-sensitive areas.
5.3 Panelization and Impedance Uniformity
Boards at panel edges experience slightly different etch rates and lamination pressure than boards at the panel center. For tight-tolerance HF boards, the manufacturer should place impedance coupons at both edge and center positions to verify uniformity across the panel. Panel layout optimization should consider impedance uniformity — not just maximum board count per panel.
6) RF-Area Solder Mask Strategy: Bare Copper, Selective Mask, or Full Coverage
6.1 Three Options and Their RF Tradeoffs
| Strategy | RF Impact | Assembly Impact | Recommended Application |
|---|---|---|---|
| No solder mask (entire board bare) | No dielectric loading; lowest loss | Solder bridging risk; no solder dams | Simple RF boards with few components |
| Selective solder mask (mask on pads/non-RF areas only) | RF traces unaffected; pads protected | Good solder control in component areas | Most HF boards with mixed RF + digital sections |
| Full solder mask coverage | Impedance shift + loss increase above 6 GHz | Standard assembly; no solder bridge risk | Sub-6 GHz designs where mask impact is tolerable |
For most HF designs above 6 GHz, selective solder mask is the standard approach. Define solder mask exclusion zones in your Gerber files that cover all RF transmission lines, antenna elements, and RF pads with at least 0.1 mm clearance around the trace edges.
7) How Highleap Supports HF PCB Design-Manufacturing Coordination
Highleap Electronics provides the design-manufacturing coordination described throughout this article:
- Process data for simulation: Measured Dk/Df, etch factors, copper roughness (Rz), and dielectric thickness data provided to design teams for accurate impedance and loss modeling
- Back-drill capability: ±0.1 mm depth tolerance, validated by cross-section on each production lot
- HF-specific DFM: Via stub assessment, anti-pad optimization, ground via density verification, solder mask exclusion zone review, and surface finish recommendation for RF performance
- Stackup co-design: Collaborative stackup development using field solver with production-validated inputs, available before layout begins
- Integrated prototyping: Rapid prototyping with full impedance and insertion loss reporting to validate simulation-to-fabrication correlation
- Assembly coordination: On-site SMT assembly with HF-substrate-specific reflow profiles, eliminating inter-facility handling of exposed RF traces

Recommended Posts
Wireless Mechanical Keyboard PCB Manufacturing
Table of contentsWireless Keyboard PCB Procurement...
Split Keyboard PCB Manufacturing & Assembly
Table of contentsSplit Keyboard PCBA Procurement...

Rapid Trigger Keyboard PCB Manufacturing & PCBA
Table of contentsRapid Trigger PCBA Buying and Performance...

QMK/VIA Keyboard PCB Manufacturing & Assembly
Table of contentsQMK/VIA Keyboard PCB Buying...
How to get a quote for PCBs
Let us run DFM/DFA analysis for you and get back to you with a report.
You can upload your files securely through our website.
We require the following information in order to give you a quote:
-
- Gerber, ODB++, or .pcb, spec.
- BOM list if you require assembly
- Quantity
- Turn time