
Back to blog
Complete PCB Manufacturing Process: From Design to Assembly

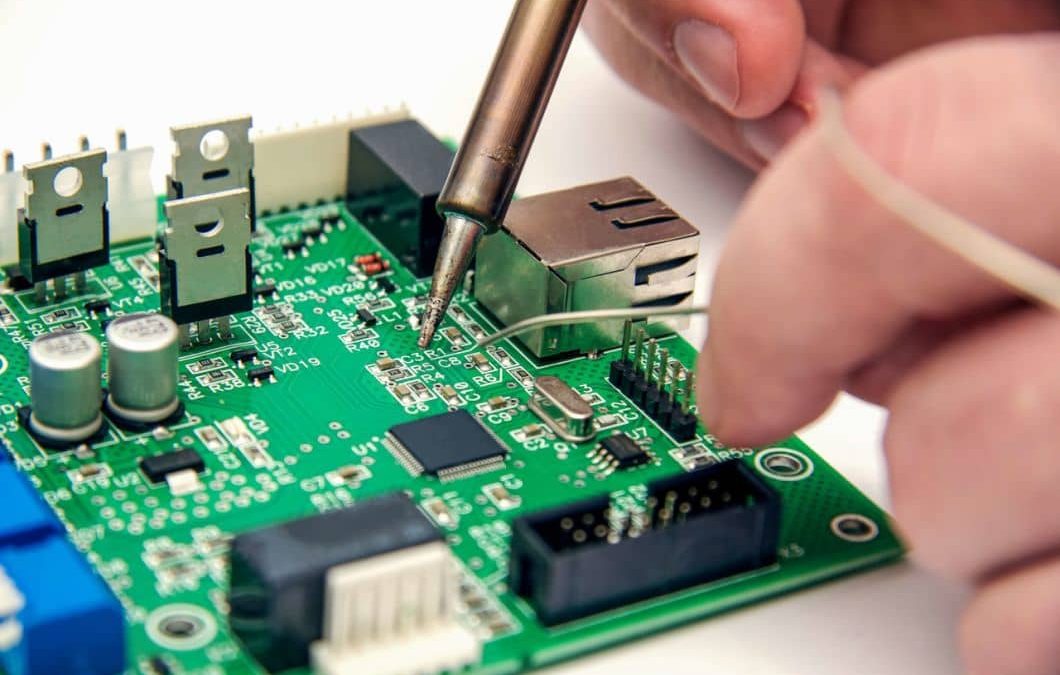
Ever wondered how printed circuit boards (PCBs)—the backbone of modern electronics—are produced with such tight tolerances and repeatable quality? From material preparation and imaging to drilling, plating, lamination, and final electrical testing, each step must be tightly controlled to turn raw laminates into reliable, high-performance circuit boards used in aerospace, medical, automotive, and consumer electronics.
If you’re looking for a broader, service-level overview of bare-board production (types, volumes, lead times, and quality controls), start with our bare-board manufacturing guide. Then, in this article, we’ll dive into the full PCB manufacturing process flow—step by step—so you can understand how precision is achieved and where quality is built in.
At Highleap, we support advanced builds such as HDI boards down to 2/2mil line/space, engineered for demanding designs where signal integrity, density, and yield matter most. Let’s walk through the complete process.
Overview of PCB Manufacturing Process
PCB manufacturing involves a complex sequence of steps to ensure optimal product performance. While fabrication processes diverge after the initial layer, all PCBs require careful adherence to process requirements.
- Complex Sequence of Steps: PCB manufacturing involves a series of intricate steps that must be followed to produce high-quality boards. These steps can vary in number and complexity depending on the type of PCB being manufactured.
- Correlation Between Steps and PCB Complexity: The number of manufacturing steps is directly related to the complexity of the PCB. Single or double-layer boards typically require fewer steps than multilayer boards, especially those with a high number of layers (e.g., 20 or more).
- Importance of Completing All Steps: Skipping any step in the manufacturing process can have negative consequences for board performance. Each step is crucial in ensuring that the PCB meets the required specifications and functions properly.
- High-Quality Result: By meticulously following the entire manufacturing process, manufacturers can produce high-quality PCBs that meet industry standards and perform reliably as essential electronic components.
- Process Execution and Control: Precise process execution and control are vital to achieving consistent results in PCB fabrication. This includes maintaining the right temperature, humidity, and other environmental factors to prevent defects and ensure product integrity.
- Attention to Detail: Attention to detail throughout the fabrication process is essential. Quality control measures, such as thorough inspections and testing, should be implemented to identify and rectify any issues that may arise during manufacturing.
PCB manufacturing is a meticulous process that requires strict adherence to established procedures and quality control measures to produce reliable and consistent electronic components. Skipping or neglecting any step can compromise the performance of the PCB, making it imperative to follow the complete and rigorous process to ensure optimal product quality.

Highleap Double-Sided PCB Manufacturing Process

Highleap Multilayer PCB Manufacturing Flow
The Complete PCB Manufacturing Process Flow
Producing a modern Printed Circuit Board (PCB) is a highly complex, multi-stage engineering process. It requires strict environmental controls, micro-level precision, and rigorous quality checks. To help you understand how raw materials are transformed into functional tech backbones, we have broken down our comprehensive PCB fabrication process into six distinct manufacturing phases.
Phase 1: Substrate Preparation
The foundation of reliable board production begins with the careful selection and treatment of the base materials.
- Material Preparation: The process starts with precision cutting of the base Copper-Clad Laminate (CCL). Common materials include fiberglass-reinforced epoxy such as FR4, as well as high-Tg and high-frequency laminates for specialized applications. Accurate panel sizing is essential to ensure zero-defect alignment in later stages.
- Board Material Baking: After cutting, panels undergo controlled thermal baking. This eliminates any absorbed moisture, which is critical to preventing delamination or blistering during high-temperature downstream processes like lamination and reflow soldering.
Phase 2: Inner Layer Processing (For Multilayer Boards)
For high-density designs, the internal circuitry must be perfectly etched and inspected before the board is pressed together.
- Laser Drilling (LDI): Advanced laser drilling is used to form microvias crucial for high-density interconnects and multilayer PCBs. This offers extreme positional accuracy for reliable interlayer connections.
- Inner Layer Dry Film Lamination: In a cleanroom environment, a photosensitive dry film resist is laminated onto the heated copper layers. UV light exposes the film through a high-resolution phototool, hardening the conductor pattern.
- Inner Layer Etching: Chemical etching solutions remove the unexposed, unwanted copper. Precise control of the etching bath ensures trace widths and spacing meet tight electrical performance tolerances.
- Inner Layer AOI: The etched inner layers are scanned using Automated Optical Inspection (AOI). The system compares the physical board against the original Gerber files to detect microscopic opens, shorts, or nicks.
- Oxide Treatment: A chemical brown or black oxide treatment creates a microscopic roughness on the copper surface. This significantly enhances the mechanical adhesion between the inner copper layers and the prepreg resin during lamination.
Phase 3: Lamination and Mechanical Drilling
This phase transforms individual copper and prepreg layers into a unified, solid board structure.
- Lamination: Inner layers, prepreg, and outer copper foils are stacked and placed into a vacuum lamination press. Under precisely controlled heat and pressure, the resin melts and cures, forming a solid, inseparable multilayer structure.
- Mechanical Drilling: High-speed CNC drilling machines create through-holes for component leads and vias. Spindle speeds and feed rates are optimized to prevent damaging internal circuitry while maintaining excellent hole wall quality.
- Deburring & Desmear: Drilling generates heat that causes resin smear. A chemical desmear and mechanical deburring process cleans the hole walls, ensuring an optimal surface for the upcoming copper deposition.
Phase 4: Outer Layer Plating and Etching
Here, the vertical electrical connections are established, and the outer visible circuitry is defined.
- Electroless Copper Deposition (PTH): A chemical bath deposits a micro-thin layer of conductive copper inside the non-conductive drilled hole walls. This connects the inner and outer layers electrically.
- Outer Layer Imaging (Negative Process): Photoresist is applied to the outer layers. Unlike inner layers, a negative imaging process is used: the areas exposed to UV light will be plated with additional copper.
- Electroplating: Copper is electrolytically plated into the holes and onto the exposed trace areas to reach the required thickness (e.g., IPC Class 2 or 3 standards). A protective layer of tin is then plated over the copper.
- Outer Layer Etching: The photoresist is stripped, and the unprotected background copper is etched away. The tin plating protects the vital circuit traces during this step, and is then chemically stripped off, leaving the final copper circuitry.
- Outer Layer AOI: A final optical scan verifies the outer traces against design specifications to guarantee zero defects before solder mask application.
Phase 5: Coating and Surface Finish
The bare copper is protected and prepared for the final component assembly.
- Solder Mask Application: A Liquid Photo-Imageable (LPI) solder mask is applied, exposed, and developed. This creates the protective layer (usually green) that prevents oxidation and stops solder bridges from forming during assembly.
- Solder Mask Inspection: Visual and automated checks ensure the mask is perfectly aligned with the pads, with no ink encroaching on solderable areas.
- Legend (Silkscreen Printing): Epoxy ink is printed to apply component identifiers, reference designators, and polarity marks. Clear silkscreen ensures accurate, error-free assembly.
- Surface Finish: Exposed copper pads receive a surface finish to prevent oxidation and ensure excellent solderability. Common RoHS-compliant finishes include:
- ENIG (Electroless Nickel Immersion Gold) – Ideal for fine-pitch components.
- Lead-free HASL – Cost-effective and highly reliable.
- OSP (Organic Solderability Preservative) – Flat and eco-friendly.
- Immersion Silver / Tin
- Hard Gold / ENEPIG – For high-wear edge connectors.
Phase 6: Final Testing, Routing, and Dispatch
The PCBs undergo final mechanical shaping and rigorous electrical validation.
- Electrical Testing: Every net is tested for continuity and isolation using Flying Probe testers (for prototypes) or custom Bed-of-Nails fixtures (for mass production) to ensure full design compliance.
- Profiling / Milling: CNC routers or V-scoring machines separate the large manufacturing panel into individual PCBs. Dimensional accuracy and smooth routing edges are strictly verified.
- Final Quality Control (FQC): A comprehensive visual and dimensional inspection guarantees that all mechanical, electrical, and cosmetic standards are met prior to shipment.
- Packaging & Storage: Finished PCBs are vacuum-sealed with desiccant in anti-static bags to prevent moisture absorption and oxidation. They are then stored in a climate-controlled environment until dispatched to the customer.
Why Choose Highleap?
As you can see, the printed circuit board (PCB) manufacturing process involves significant effort. To ensure that PCBs are manufactured to meet your desired quality, performance, and durability, it is crucial to choose a manufacturer with a high level of expertise and a focus on quality at every stage.
Highleap is one of China’s most experienced custom PCB production service providers. We believe that our success is measured by the success of our clients, which is why we prioritize meticulous care and attention to detail throughout each step of the PCB manufacturing process. Additionally, we offer vacuum packaging, weighing, and reliable delivery to ensure that your PCB order arrives safely and without any damage.
The PCB manufacturing process is the backbone of modern electronics, ensuring reliable, high-performance boards for a wide range of applications. At Highleap, we pride ourselves on delivering precision and quality at every step, from material preparation to final testing. Whether you need quick-turn prototypes or large-scale production, our expertise guarantees PCBs that meet your exact needs. Contact us today to request a quote and bring your ideas to life with industry-leading PCB manufacturing solutions!
Frequently Asked Questions (FAQ) About PCB Manufacturing
1. What is the standard lead time for PCB manufacturing, and what factors cause delays?
Standard double-sided boards typically take 3 to 5 days to manufacture, while complex Multilayer or HDI (High-Density Interconnect) PCBs can take 10 to 15 days or more. Delays usually stem from two main categories:
- Technical Factors: Sequential lamination cycles (pressing the board multiple times for blind/buried vias), laser drilling, and advanced via-filling or planarization processes.
- Operational & Communication Factors: Delayed responses to Engineering Questions (EQs) during the DFM review, mid-production design changes (Engineering Change Notices / ECNs), and the time required to source non-standard materials. Rapid EQ confirmation is critical to keeping your production on schedule.
2. How can I optimize my PCB design to reduce manufacturing costs?
To optimize costs, focus on Design for Manufacturing (DFM) and material efficiency. Consider the following:
- Routing & Structures: Use standard trace widths and spacing, minimize the total layer count, and standardize your drill hole sizes. Avoid blind/buried vias and via-in-pad unless absolutely necessary.
- Panel Utilization: Design your board dimensions to maximize the yield from standard manufacturing panels to prevent raw material waste.
- Surface Finish: Choose a cost-effective finish like Lead-free HASL or OSP if the extreme flatness of ENIG (Gold) is not electrically required.
3. Which manufacturing stage is most susceptible to defects, and how are they prevented?
Defects most commonly originate during inner layer etching, drilling, and copper plating. Over-etching can alter trace impedance, drilling misalignment causes internal shorts, and uneven plating can cause weak vias.
To prevent this, APTPCB implements a zero-defect policy: We utilize Automated Optical Inspection (AOI) after every etching step, employ X-ray target drilling for precise layer-to-layer registration, and tightly control chemical bath concentrations during the Plated Through Hole (PTH) process.
4. How are advanced via structures (blind, buried, via-in-pad) processed differently from standard vias?
Unlike standard mechanical through-holes, advanced vias require a highly complex process called Sequential Lamination. For blind and buried vias, inner sub-assemblies must be pressed, laser-drilled, plated, and then pressed again with the outer layers.
Additionally, via-in-pad requires a specialized VIPPO (Via-In-Pad Plated Over) process. The via is plated shut, filled with epoxy, planarized (sanded flat), and plated over with copper so components can be soldered directly on top without solder wicking.

Recommended Posts
What is a Cold Joint Solder and How Can You Prevent it?
[pac_divi_table_of_contents title="On this article"...
Demystifying BGA Soldering: Tips and Best Practices
[pac_divi_table_of_contents title="On this article"...

Selecting the Right PTFE Material for Your PCB
[pac_divi_table_of_contents title="On this article"...

20 Analog Circuits Engineers Should Master
[pac_divi_table_of_contents title="On this article"...
How to get a quote for PCBs
Let us run DFM/DFA analysis for you and get back to you with a report.
You can upload your files securely through our website.
We require the following information in order to give you a quote:
-
- Gerber, ODB++, or .pcb, spec.
- BOM list if you require assembly
- Quantity
- Turn time
In addition to PCB manufacturing, we offer a comprehensive range of electronic services, including PCB design, PCBA (Printed Circuit Board Assembly), and turnkey solutions. Whether you need help with prototyping, design verification, component sourcing, or mass production, we provide end-to-end support to ensure your project’s success. For PCBA services, please provide your BOM (Bill of Materials) and any specific assembly instructions. We also offer DFM/DFA analysis to optimize your designs for manufacturability and assembly, ensuring a smooth production process.