
A Complete Guide to Manufacturing Printed Circuits

Printed Circuit Manufacturing is a multifaceted process that transforms raw materials into the essential foundation of modern electronics. From mobile devices to industrial control systems, Printed Circuit Boards (PCBs) are integral to nearly all electronic devices. The printed circuit manufacturing process requires precise coordination between design and production teams to ensure functionality, durability, and quality.
In the following sections, we will dive deeper into the essential parts of a PCB, explore the stages of production, and examine how partnering with a professional manufacturer is key to achieving the highest standards of reliability and performance.
The Essential Parts of a PCB
To understand the printed circuit manufacturing process, it’s crucial to become familiar with the key components that make up a PCB. Each of these elements plays a critical role in ensuring that the circuit board operates as intended:
- Substrate: Serving as the base material, the substrate is typically made from fiberglass (FR4). This provides the structural integrity needed to resist stress and breakage, functioning as the PCB’s “skeleton” to ensure long-term durability.
- Copper Layer: This layer forms the electrical circuitry of the PCB. Whether applied as copper foil or coating, it conducts the electrical signals necessary for the board to function, much like the nervous system in the human body.
- Solder Mask: The solder mask is a protective polymer layer that covers the copper traces, preventing short circuits and oxidation. It acts as the “skin” of the PCB, safeguarding the copper pathways while ensuring proper soldering during assembly.
- Silkscreen: This layer provides labels, symbols, and identifiers that make it easier for technicians to assemble and troubleshoot the PCB. The silkscreen acts as a visual guide, marking component locations and providing critical information.
Next, we will explore the intricate stages involved in the manufacturing printed circuits process, ensuring that each PCB is built to meet the highest quality standards.
Manufacturing Printed Circuits: A Detailed Process
Manufacturing printed circuit boards (PCBs) involves intricate processes that demand precision, advanced technology, and stringent quality control to ensure both functionality and durability. Below is an in-depth analysis of the PCB manufacturing stages, incorporating professional terminology commonly used in factory production environments.
1. Design and Layout
The manufacturing journey begins with PCB design, utilizing sophisticated software tools such as Extended Gerber (IX274X) for circuit mapping, component placement, and multi-layer architecture. This initial blueprint not only dictates the board’s electrical performance but also serves as a foundation for the subsequent Design for Manufacturability (DFM) review. This review critically assesses the design against manufacturing tolerances, focusing on trace width, spacing, and impedance control to ensure it can be reliably produced at scale.
2. Advanced Photomasking Techniques
Once the design is approved, the creation of a photomask follows, which is pivotal in defining the circuit layout on the copper-clad laminate (CCL). The laminate is coated with a layer of photoresist, a light-sensitive material, which is then exposed to ultraviolet (UV) light through the photomask. This exposure hardens the photoresist in the desired areas, forming a protective barrier on the copper substrate. This process, combined with registration holes, ensures the precise alignment of complex circuit patterns, allowing for high-density designs and ensuring accurate layer-to-layer connectivity in multilayer PCBs.
3. Precision Copper Etching
The etching process removes unprotected copper, leaving only the intended traces. Utilizing etchants such as ferric chloride or ammonium persulfate, this step is critical for maintaining trace integrity across the board. For multilayer PCBs, each layer undergoes individual etching, ensuring that intricate signal integrity requirements are met. Additionally, etch factor control is essential to maintain uniformity, particularly for high-frequency or impedance-controlled designs.
4. Layer Alignment and Advanced Lamination Techniques
In multilayer designs, precise alignment of each copper layer is vital for achieving proper electrical connectivity. This is done by utilizing registration holes to ensure high accuracy. The lamination process employs prepreg materials (pre-impregnated fiberglass) between each layer, combining heat and pressure in a lamination press to fuse them together. This step is crucial for ensuring board stability and durability, especially in high-reliability applications where any misalignment or voids in the lamination could lead to long-term performance issues such as delamination or electrical failure.
5. High-Precision Drilling
Once laminated, drilling begins, targeting via holes that connect the various layers of the PCB. This is achieved using CNC drilling systems, which ensure the exact placement of vias and through-holes with micron-level precision. For HDI (High-Density Interconnect) boards, laser drilling is often employed to create microvias, which are essential for maintaining signal paths in tightly packed designs. Drilling must also account for thermal management by optimizing hole size and distribution to dissipate heat efficiently.
6. Electroplating: Establishing Robust Connectivity
Following drilling, the vias and through-holes undergo electroplating to ensure reliable electrical connectivity between layers. In this step, the holes are coated with a thin layer of copper, providing a conductive path. This process, known as Plated Through Hole (PTH), requires precise control of bath composition and current density to ensure uniform copper deposition. Variations in this step can lead to weak connections or defects like insufficient hole wall plating.
7. Comprehensive Outer Layer Imaging and Etching
The outer layers are imaged using the same photomasking techniques as the inner layers, but with an added focus on achieving finer trace resolution. After applying a new layer of photoresist, the outer copper traces are defined using UV exposure. The etching process then removes the unneeded copper, leaving behind the precise conductive paths. Achieving uniform etching across large panels is critical to maintaining trace width tolerance and ensuring that outer-layer copper traces meet the high precision required for advanced designs.
8. Innovative Solder Mask Application
Once the copper traces are complete, a solder mask is applied to protect the exposed copper from environmental damage and prevent solder bridges during assembly. This is done using advanced methods such as Laser Direct Imaging (LDI) to apply the mask with precision, especially important for designs with fine-pitch components or tight trace layouts. The solder mask application process involves applying a liquid mask to the PCB, followed by UV curing to solidify it. Only the component pads, where soldering will occur, are left exposed.
9. Tailored Surface Finishes for Enhanced Reliability
Surface finish selection is critical in determining the PCB’s solderability and long-term corrosion resistance. Common finishes include Hot Air Solder Leveling (HASL), where molten solder is applied to the exposed pads and leveled with hot air, and ENIG (Electroless Nickel Immersion Gold), which provides excellent protection and a smooth solder joint. Another popular choice is Organic Solderability Preservative (OSP), a lead-free option that maintains copper’s solderability without the use of heavy metals. Each finish offers unique benefits depending on the application, from low-cost options to high-performance, corrosion-resistant finishes for mission-critical devices.
10. Silkscreen Layer for Enhanced Usability
The silkscreen layer provides vital information on the PCB, such as component identifiers, logos, and test points. This layer is printed onto the board using advanced screen printing or inkjet printing techniques to ensure high resolution and durability. Silkscreens are essential not only for aiding assembly but also for facilitating future maintenance and testing. Proper alignment of the silkscreen with the underlying solder mask and copper traces ensures that markings are clear and do not interfere with component placement.
11. Rigorous Electrical Testing Protocols
Before finalization, PCBs undergo comprehensive electrical testing to validate circuit functionality and detect any defects. Automated Optical Inspection (AOI) is an essential step in this process, using high-resolution cameras and imaging algorithms to inspect solder masks, copper traces, and other features for alignment or surface defects. Additionally, functional testing methods such as Flying Probe Testing and Bed of Nails Testing are employed to check for short circuits, open circuits, and other electrical faults, ensuring compliance with design specifications.
12. Final Profiling and Routing with Precision Tools
Once testing is complete, the PCBs are routed to their final shape using CNC routing or laser cutting. This step defines the board’s final dimensions and ensures that all edges are smooth and free from burrs, which could affect assembly or component placement. V-Scoring or tab routing may also be used to facilitate the separation of individual boards from a larger production panel during assembly.
13. Comprehensive Final Inspection and Quality Assurance
Following routing, the PCBs undergo a final inspection, which includes visual checks and automated optical inspection (AOI). This inspection ensures that the solder mask, silkscreen, and surface finishes meet stringent quality standards. Any defects identified during this stage, such as misaligned layers, poor solder mask coverage, or surface finish irregularities, are addressed before the boards proceed to the next phase.
14. Protective Packaging and Logistics
Upon passing all inspections, the PCBs are packaged in anti-static bags to protect them from electrostatic discharge (ESD) and environmental factors such as moisture. The packaging process often involves vacuum sealing or bubble wrapping to prevent damage during transport. This step is crucial in maintaining the board’s integrity until it reaches the customer or assembly house.
The PCB manufacturing process involves a complex array of advanced techniques, from photomasking and electroplating to solder mask application and rigorous testing. By refining each stage—from design to packaging—manufacturers can deliver high-quality PCBs that meet the stringent demands of modern electronic applications. Understanding these intricacies ensures that even the most complex PCB designs are produced efficiently and reliably, with a focus on quality and performance.

How to Optimize PCB Design for Efficient Manufacturing
In the PCB manufacturing process, the design phase plays a critical role in ensuring that production runs smoothly, efficiently, and cost-effectively. Optimizing the design of printed circuit boards (PCBs) not only reduces production errors but also minimizes costs and turnaround time. This practice, commonly known as Design for Manufacturability (DFM), ensures that the PCB design aligns with manufacturing capabilities and constraints. Below are several strategies to optimize PCB design for manufacturing.
1. Simplify the Layer Structure
The number of layers in a PCB significantly impacts both cost and complexity. Multilayer boards are more expensive to manufacture and require more time due to additional lamination, drilling, and alignment processes. To optimize production:
- Reduce Layer Count: Consolidate functions into fewer layers where possible without compromising performance. A well-optimized design might turn an 8-layer board into a 6-layer board.
- Avoid Unnecessary Complexity: Ensure that every layer serves a purpose and isn’t adding complexity unnecessarily.
2. Standardize Via Types
Vias are small holes that connect different layers of the PCB. While advanced vias (e.g., blind, buried, or microvias) are sometimes necessary, they increase manufacturing complexity and cost. When optimizing PCB design for production:
- Use Through-Hole Vias: These are simpler and cheaper to produce compared to blind or buried vias.
- Minimize the Use of Microvias: Use microvias only when absolutely necessary, such as in high-density interconnect (HDI) designs.
3. Optimize Trace Widths and Spacing
Trace widths and spacing are critical for both signal integrity and manufacturability. Narrower traces and tight spacing can lead to production challenges, such as issues with etching and plating. To optimize:
- Follow Manufacturer’s Minimum Trace Width and Spacing Guidelines: Ensure that trace widths and spacings adhere to the manufacturer’s recommended minimums. Increasing trace width can improve reliability and reduce production defects.
- Consider Thermal Management: Wider traces help with heat dissipation, especially for high-current paths, reducing the risk of thermal failure during operation.
4. Use Standard Board Materials and Thicknesses
While there are many substrate materials available, such as advanced high-frequency laminates, using standard materials like FR4 is more cost-effective and widely supported by PCB manufacturers. Standardizing:
- Use Industry-Standard Materials: FR4 is a widely accepted standard that is reliable and cost-effective for most applications.
- Stick to Common Board Thicknesses: A board thickness of 1.6 mm is standard and helps simplify manufacturing and reduce costs.
5. Optimize Component Placement for Assembly
Component placement directly impacts how easily and efficiently a board can be assembled. Poor component placement can lead to bottlenecks during automated assembly processes. To optimize component placement:
- Group Similar Components Together: Group resistors, capacitors, and other similar components to simplify pick-and-place operations.
- Place Components with Clear Orientation: Ensuring that polarized components (like diodes or electrolytic capacitors) are aligned consistently reduces errors during assembly.
- Leave Enough Space for Soldering and Testing: Ensure adequate spacing between components to avoid solder bridging and allow for easier testing and rework if necessary.
6. Design with Manufacturing Tolerances in Mind
Manufacturing tolerances are the small deviations that occur naturally during the production process. Designing within these tolerances ensures that the final product meets functional requirements despite minor variations.
- Adjust Hole Sizes and Tolerances for Drilling: Allow for tolerances in hole diameters, especially in plated-through holes. Drilled holes tend to expand slightly during the plating process.
- Design for Solder Mask Tolerances: Make sure the solder mask clearance accounts for slight misalignments that can happen during production.
7. Reduce Signal Crosstalk and Electromagnetic Interference (EMI)
For complex, high-frequency PCBs, signal integrity is critical. Proper routing and layer stacking can reduce crosstalk and EMI, which can complicate the manufacturing process and affect performance.
- Use Ground Planes: Incorporate solid ground planes to reduce EMI and improve signal integrity. This also simplifies routing and ensures consistent performance across the board.
- Avoid Long Parallel Signal Traces: Long traces running parallel to each other can induce crosstalk. By routing signals perpendicular to each other on adjacent layers, you can reduce interference.
8. Design for Panelization
Panelization is the process of fabricating multiple PCBs together in a single panel, which improves manufacturing efficiency. To optimize panelization:
- Use Consistent Board Sizes: Where possible, design the board to fit into common panel sizes used by manufacturers.
- Add Fiducial Marks: Fiducial marks help alignment during assembly. Ensure that fiducials are placed in consistent, easy-to-locate positions on the panel.
9. Minimize Via and Trace Complexity
While advanced via techniques such as blind and buried vias can be useful in saving board space, they complicate manufacturing and increase costs. Keep vias simple to:
- Reduce Manufacturing Time and Cost: Through-hole vias are easier to produce and generally more reliable than blind or buried vias.
- Avoid Stacked or Overlapping Vias: This adds complexity to drilling and plating processes, increasing the chances of manufacturing defects.
10. Improve Testability
Designing with testability in mind ensures that your board can be easily tested during and after production to catch potential defects.
- Include Test Points: Add easily accessible test points that allow for probing critical signals.
- Avoid Components on Test Points: Ensure that test points are not placed under large components where they are hard to access during functional testing.
Optimizing PCB design for manufacturing can greatly reduce production time, cost, and defect rates. By focusing on simplifying the design, adhering to manufacturer specifications, and ensuring testability and component placement optimization, you can streamline the manufacturing of printed circuits and improve overall product reliability. Ensuring proper Design for Manufacturability (DFM) practices is key to achieving efficient, high-quality PCB production, helping both designers and manufacturers save time and money while delivering top-performing products.
Our PCB Manufacturing Capabilities
At HiElectronic, we offer a wide range of PCB fabrication services to meet the specific needs of various industries, from consumer electronics to automotive and industrial applications. Below is a list of the PCB types we specialize in, highlighting our extensive capabilities and expertise.
Key Products We Manufacture:
- FR4 PCBs: The most commonly used type of PCB, featuring excellent strength and durability. FR4 is ideal for most standard electronic applications. Our capabilities extend up to 60 layers with 2/2 mil trace and space.
- HDI PCBs (High-Density Interconnect): With advanced laser drilling technology, we can achieve min laser drilling of 0.075mm and handle high-density applications requiring smaller vias and finer traces.
- Flexible PCBs: Offering flexibility and light weight for applications where traditional rigid PCBs are not feasible. These are commonly used in wearables, medical devices, and automotive electronics.
- Rigid-Flex PCBs: Combining the benefits of both rigid and flexible PCBs, suitable for applications that require flexibility in design but strength in certain areas. Our aspect ratio for mechanical drilling is 20:1.
- Metal Core PCBs: Ideal for high-power applications requiring effective heat dissipation, such as LED lighting and power electronics.
- Heavy Copper PCBs: With up to 10oz copper layers, these PCBs are designed for high-current, high-temperature environments, offering superior performance for power electronics.
- High-Frequency PCBs: Designed for RF and microwave applications, these boards maintain signal integrity at high frequencies, making them suitable for telecommunications and radar systems.
- Ceramic PCBs: Known for their excellent thermal conductivity and high heat resistance, ceramic PCBs are ideal for aerospace, automotive, and LED applications.
Precision in Manufacturing
- Laser Drilling: Minimum laser drilling hole diameter as low as 0.075mm.
- Mechanical Drilling: With minimum mechanical drilling of 0.1mm and tolerance of ±0.05mm.
- Impedance Control: For high-frequency designs, we offer tight impedance control with a tolerance of ±5Ω for single-ended signals and ±7% for differential pairs.
Surface Finishing Options
We offer a comprehensive range of surface finishes to meet the specific requirements of your products, ensuring reliability, enhanced solderability, and protection against environmental factors. Our available surface finishes include:
- ENIG (Electroless Nickel Immersion Gold)
- HASL (Hot Air Solder Leveling)
- Immersion Silver
- Immersion Tin
- OSP (Organic Solderability Preservative)
- ENEPIG
- Flash Gold
- Immersion Palladium
Other Capabilities:
- Board Thickness: From 0.4mm to 8mm with ±10% thickness tolerance.
- BGA/SMT Support: We support min BGA size of 7 mil and min SMT pitch of 7×10 mil.
- Solder Mask: Available in green, black, blue, red, and matt green, with a minimum clearance of 1.5 mil.
In addition to these capabilities, we offer a range of specialized services that cater to unique, non-standard requirements. If your project demands a customized or unconventional approach, please reach out to us. Our expert team will conduct a thorough process review and provide you with tailored, innovative manufacturing solutions that ensure optimal performance and reliability.
For a full list of our capabilities and specifications, please visit our rigid PCB capability page, or contact us directly for personalized consultations and solutions.
Conclusion
The manufacturing of printed circuits is a complex process that requires precision, attention to detail, and expertise in both design and fabrication. By following these steps, manufacturers can produce high-quality PCBs that meet the strict requirements of modern electronics.
At our facility, we take pride in providing advanced PCB manufacturing services with a focus on quality, reliability, and customer satisfaction. From design verification to final inspection, we ensure that every PCB we produce meets the highest industry standards.
If you’re looking for a trusted partner for your next PCB project, contact us today for more information about our capabilities and how we can assist you in manufacturing printed circuits to suit your specific needs.
Get a Free PCB & PCBA Quote

Recommended Posts

8 Steps to Manufacture a Perfect Aluminum PCB
Figure 1. Aluminum Pcb manufacturing reference for PCB...
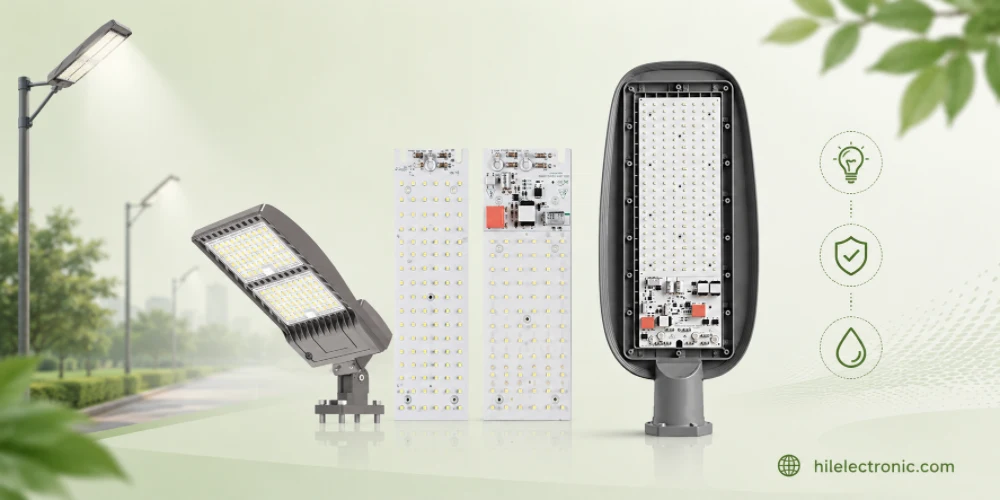
Outdoor Lighting PCB Manufacturing & Assembly by Highleap Electronics
Figure 1. outdoor lighting PCB production and assembly...
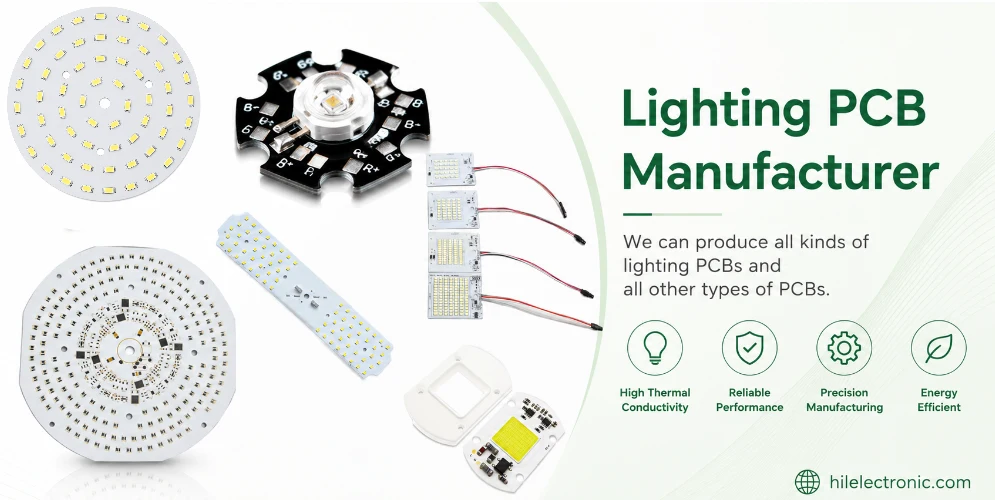
Lighting PCB Manufacturer: PCB Fabrication, PCB Assembly & Turnkey LED Lighting
Figure 1. Lighting PCB manufacturer overview for LED light...

Audio DSP: How It Works, What It Does, and How the PCB Behind It Gets Built
On this page What Audio DSP Actually Does Core Audio DSP...
How to get a quote for PCBs
Let us run DFM/DFA analysis for you and get back to you with a report.
You can upload your files securely through our website.
We require the following information in order to give you a quote:
-
- Gerber, ODB++, or .pcb, spec.
- BOM list if you require assembly
- Quantity
- Turn time
In addition to PCB manufacturing, we offer a comprehensive range of electronic services, including PCB design, PCBA (Printed Circuit Board Assembly), and turnkey solutions. Whether you need help with prototyping, design verification, component sourcing, or mass production, we provide end-to-end support to ensure your project’s success. For PCBA services, please provide your BOM (Bill of Materials) and any specific assembly instructions. We also offer DFM/DFA analysis to optimize your designs for manufacturability and assembly, ensuring a smooth production process.